Twisting faces
Some usecases of clmtrackr
In the previous post, I explained how CLMtrackr was put together. Since then, my examples of face substitution and emotion detection has received a fair amount of attention, so in this post I’m going to explain a bit about how these are put together as well, plus comment on some fixes that I’ve done to CLMtrackr recently.
Face substitution
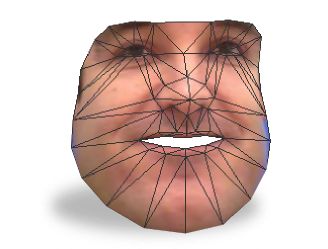
This demo was inspired by a face substitution demo by Arturo Castro & Kyle McDonald. Basically it substitutes, or overlays, another persons face over your face, and does some fancy tricks to make it look natural. To do this with CLMtrackr, we first have to annotate the face in the image we want to substitute, and we can then deform this face (using face_deformer.js) to the same shape as your face, and overlay it in the exact same pose and position.
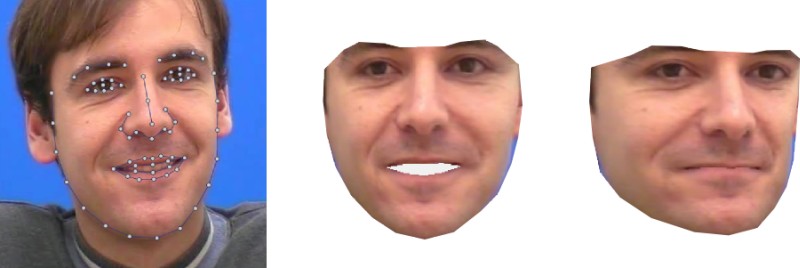
But in order to make it look natural (or creepy, as some would say), we also have to use a method called poisson blending. Usually, when you paste one image onto another, it’s easy to tell that there’s been a copy-paste operation, since the colors of the edges of the pasted image won’t quite match up with the background.

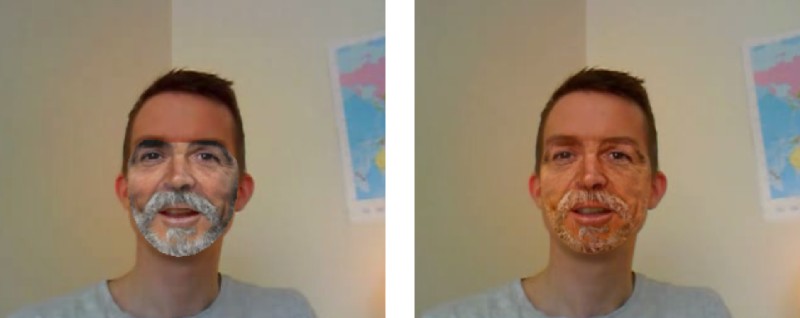
Poisson blending counteracts this, by smoothing the color gradients on the edges of the pasted image with the background image, so that the transformation from one image to the other will look smooth. We also then have to change the gradients of the rest of the pasted image, so we end up with a huge differential equation that needs to be solved. Thankfully, I didn’t have to implement the algorithms for solving this myself, since ‘wellflat’ had already implemented it in javascript. Kudos to him! The poisson blending for the most part works very well, and you get a seamless blend of the two images. Note that since the poisson blending takes a bit of time in javascript, I only do the blending on the initialization of the image (i.e. when switching faces). This means that if you change the lighting after switching faces, the blending might look a bit off. If you’re interested in some more info about poisson blending, see for instance this article.
Emotion detection
For the emotion detection demo, I used a pretty basic classification method called logistic regression. We already have a parametric model of the face, so we can use the parameters of the model as features. For training, we annotate images of people expressing the emotions we are interested in and project these annotations onto our PCA decomposition (as described in the previous post) to get the closest parametrization. These parameters are then input as training data for the regression. The classification works relatively OK, but a better method would be to first establish some neutral “baseline” for each person before classifying, since there is some variation from person to person which throws off the classification.
Another classification solution might be to use random forests, (which happens to be implemented in javascript). This usually gives better classification results, but probably is a bit slower, so I didn’t try it out. Since most of the emotion classifiers are only trained on 20 or so positive examples, we would also probably get much better classification with more data. Code for training your own classifier with logistic regression is here, so give it a spin if you’re interested in improving it!
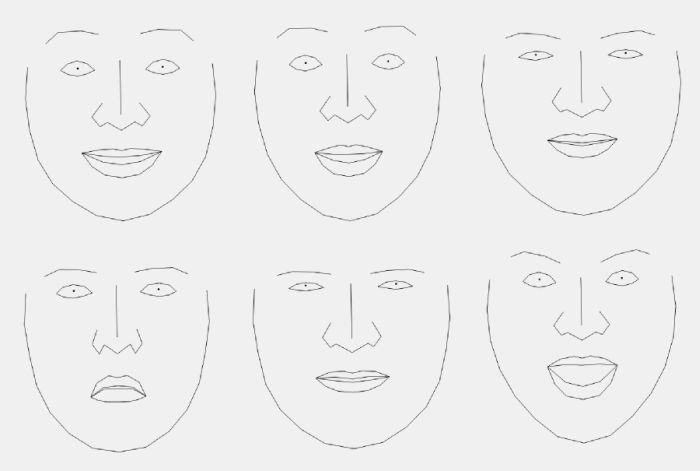
A fun side effect of the emotion classifier is that we can illustrate the learned emotions by using the regression coefficients as parameters for our facial model:
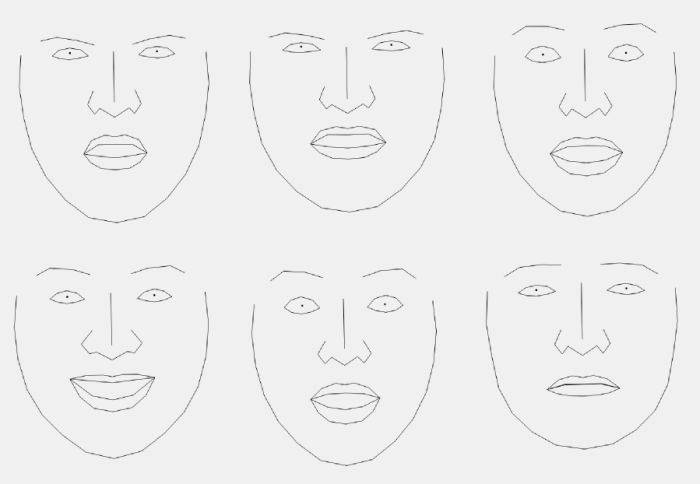
Some of these learned emotions look very similar, which caused the classifier to have a hard time distinguishing them. Interestingly, we can also negate the coefficients to see what the opposites of the learned emotions look like:
Play with the visualizations of the learned emotion model here
The classification method is not only restricted to emotions, so we could also try to classify whether a person is male or female. Try out a demo of this here, though note that it’s not really that accurate. Below are the resulting faces from the learned gender classifier:

Deforming the face
Some other toy examples I’ve added is live face deformation and live “caricatures”.

Both of these demos are based on capturing your face, deforming the face in some way, and pasting it back over your original face. The caricature demo was fairly easy to put together - the parameters in our parametric model of face describe the “offsets” from a mean face, meaning that these offsets distinguish any face from an “average face”. We can use this to create very simple “caricatures”, where we exaggerate the difference from the mean face by multiplying the parameters, and then overlay the deformed face with the new parameters over the original video. We can of course also modify (add constant offsets to) the parameters manually, i.e. deform your own face in realtime, which gives rise to the face deformation demo.
Improvements
As I discussed doing in my previous blog post, I’ve also added local binary patterns and sobel gradients as preprocessing for responses. Especially local binary patterns seem to be more precise than raw responses, at the cost of some slowdown (due to need to preprocess patches). Since they’re slower, they’re not used by default, so you’ll have to enable them on initialization if you want to use them. Check out the reference for documentation on how to enable the different types of responses. There’s also the possibility to blend or cycle through different types of responses, which in theory might improve precision, a la ensemble models. Try out the different responses and combinations here.
In other news, CLMtrackr was used in this years april fools on reddit : “headdit”. For an april fools, the gesture recognition worked surprisingly well, though I’ll admit to not throwing away my mouse and keyboard just yet.
If you liked this blogpost, you should follow me on twitter!